Illusions Sampler Block-of-Month - Month 1
- cynthiadpconcha
- Apr 9, 2022
- 3 min read
Hey there lab assistants! I'm a bit behind in my blogging so I'm going to try to do some catch up on an exciting project I'm working on this year. Check it out!


In January, I introduced this beautiful block to an awesome group of ladies. The original block using the stunning batiks fabric is pictured above the scrappy version of the block is below. It's a great first block with simple techniques.
As seen to the right, the blocks are divided into 3 parts:
- main block
- accent strips (horizontal and
vertical)
- background fabric and piecing
The Illusions Sampler BOM program is a skill building quilt. You can check out all the details on it by going to the Northcott - Banyan Batiks website. Month one introduces the quilter to several good beginning quilting lessons.
I began the BOM with a video on sewing an accurate ¼" seam. As an experienced quilter it's easy to over look this step or become a sloppy quilter and ignore ¼ inch accuracy.
Check out my video on my YouTube channel to view it. (link below) But here's a quick summary:


To test your ¼ inch seam cut 3 pieces of fabric at the same width and length. I choose 2 inches by 5 inches in these pictures. Also, I like to pick two different fabrics, and use an alternate in the middle to help see the difference.
Sew the three strips together using your ¼ inch foot or the ¼ inch guide on your machine.
In this picture, I'm using my Pfaff Creative Icon with the ¼ inch foot. I'm also showing where the ¼ inch guide is by "lengthening" it with a piece of painters tape. This is a great way to really see the pieces coming together straight. You don't want wavy seams.
Press the seams and block nice and flat.
Then measure the middle piece of fabric. It should be a ½" narrower than the original piece you cut. In this case, it should measure at 1½" wide down the entire length of the seam.
The two outside pieces should measure a ¼ inch narrower; here they are both 1¾" wide.
Adjust your foot, needle position, guide as needed - or aim your fabric off a bit - to achieve an accurate ¼ inch seam.
Back to Block 1!
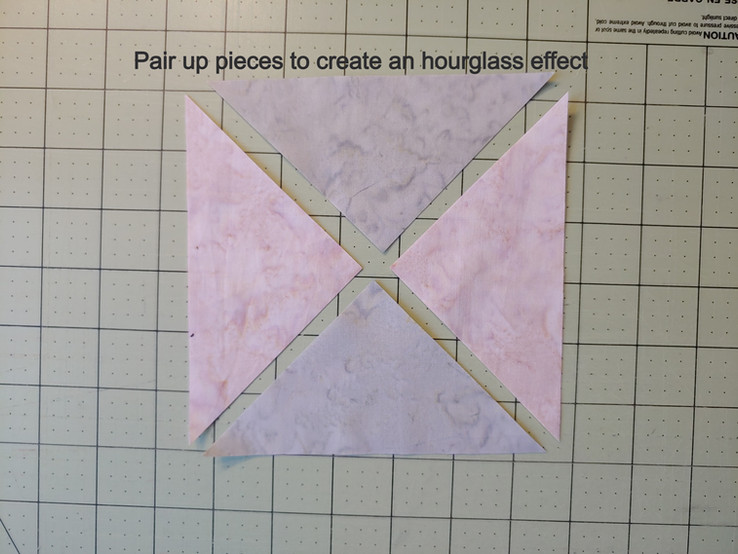
Each block will focus on a new technique. Month 1 showcases the quarter square triangle; seen both in the main block and in the horizontal accent strip. Check out my scrappy month 1 walk through for a thorough explanation of how to do this block. Here's a quick slide show to give you the idea:


Each section of the pattern has cutting instructions and then piecing instructions. I really like the way Scott Flanagan, the pattern designer, has set up the directions because it makes the steps very clear. He doesn't have you cut all the fabric at once, but spaces it out with each section, so you can immediately see how each piece comes together.
And for me, it's less likely I'll misplace a cut piece of fabric, so there's no need for me to label or bag up pieces that aren't being used at the moment.
Once the main block is finished, it is set aside and focus is moved to the two accents strips. After both the horizontal and vertical strips are pieced, those now get set aside and the background fabric is cut.
The last step for each block is the same for every month. Take all the blocks, strips, pieces, etc., and lay them out; then systematically piece them together. The finished block is quite big, but because these instructions are so clear, it comes together very easily.
Here's one more look at Month 1:

It's gorgeous! Let's move on to Month 2!
Thanks for stopping by my quilt lab today!
Cynthia


Comments